Introduction
Repair a shower faucet that won’t shut off. Most single-handle, cartridge-style faucets can be repaired in an hour or less with basic tools.
Tools Required
- 4-in-1 screwdriver
- Adjustable wrench
- Handle puller
- Pocketknife
Materials Required
- Cartridge
- Plumber’s grease
Identifying a cartridge-style faucet
Shower valve cartridge replacement
Step 1
Remove the handle
Remove the handle cap
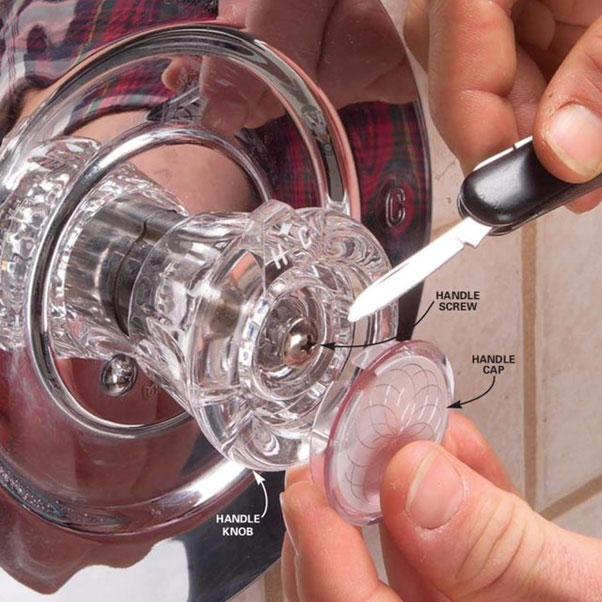
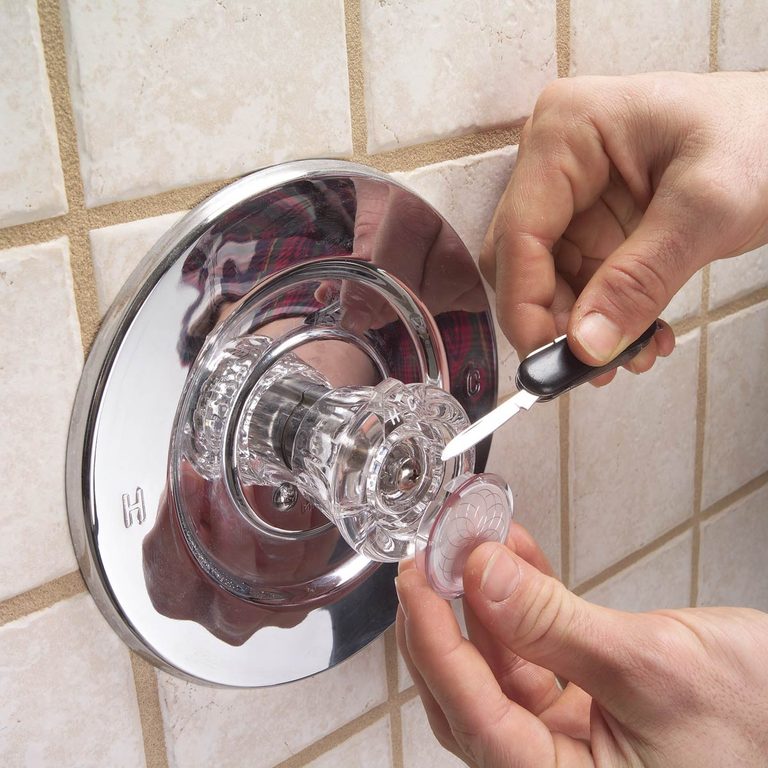
Turn off the water supply to the shower. Then pry off the handle cap with a small pocketknife to expose the internal handle screw.
Step 2
Remove the handle screw, then the handle
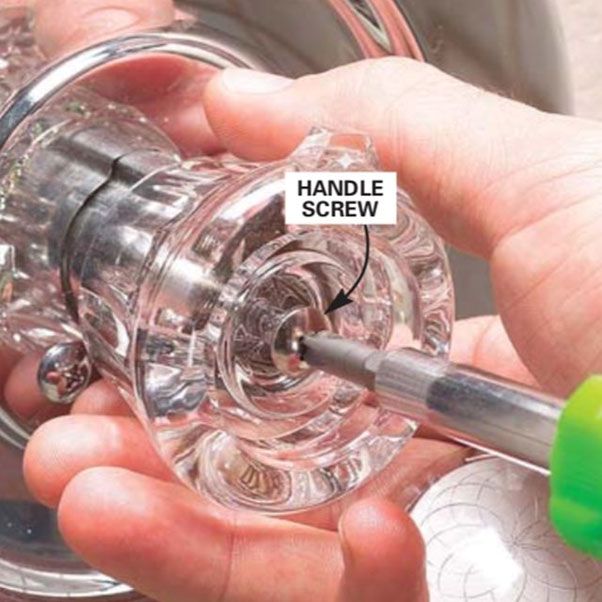
Loosen and remove the handle screw. Pull off the handle and set it aside. Turn off the water at the fixture shutoff valves or at your home’s main valve. Turn on a faucet to make sure it’s off. Remove the handle as shown in Photos 1 and 2. If the handle sticks, try heating it with a hair dryer set on “hot”. If you still can’t get it off, use a special handle puller—an inexpensive tool available from plumbing parts distributors or home centers.
Pry up the retaining clip
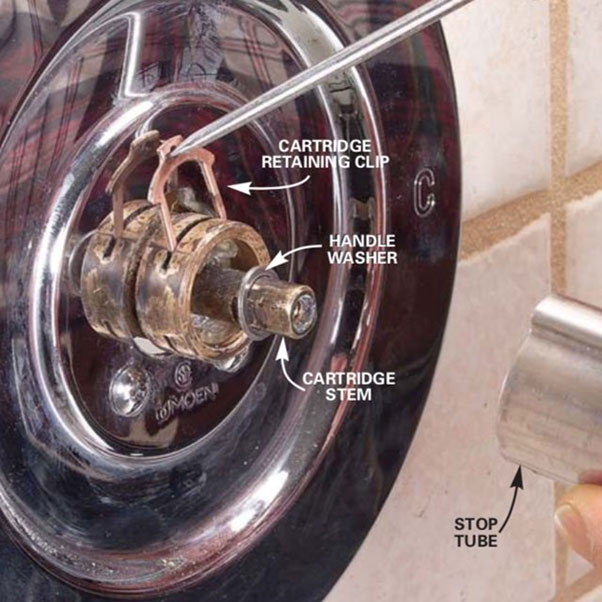
Pull off the stop tube. Pry up the cartridge retaining clip with a small screwdriver or awl. Remove the handle washer and then twist the cartridge stem loose and pull it out with pliers.
Step 4
You may need a cartridge puller
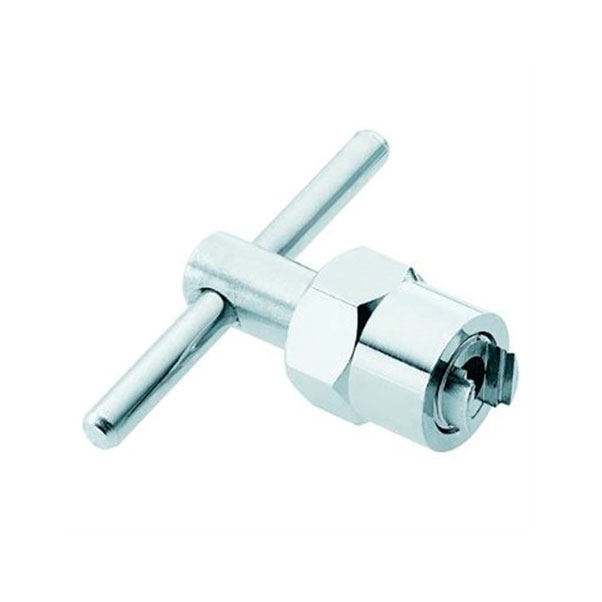
If it’s stuck, use a special cartridge puller. Unscrew the hex screw and hex nut until threads are visible. Slide the puller over the cartridge stem, aligning the tool ears with the cartridge notches, and twist to loosen. Virtually every faucet manufacturer has a different method of securing the cartridge to the faucet body. Look for a clip or spring and remove it (Photo 3). Cartridges are often difficult to pull out. Some manufacturers include a removal cap with new cartridges. Align the cap with the old cartridge ears and try to twist the cartridge loose. Then pull it out with pliers.
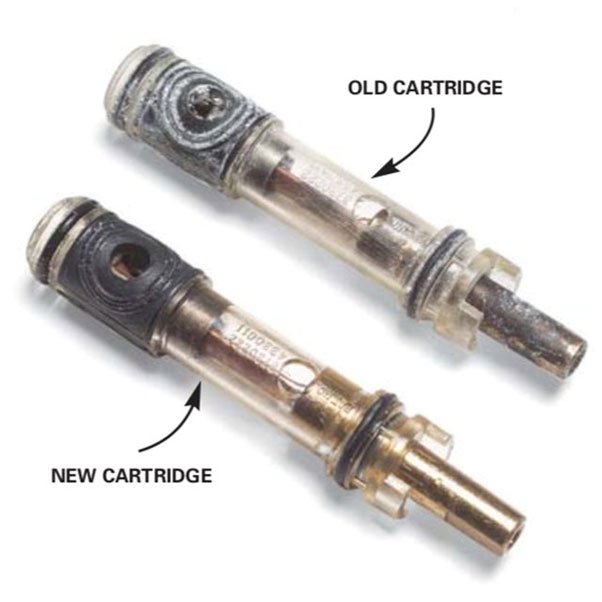
If you can’t budge the old cartridge, you’ll need a cartridge puller. Make sure the one you buy works on your brand of faucet. Look on the handle or trim for the faucet brand or manufacturer. A knowledgeable person at a plumbing parts store may be able to identify the brand and model from a photo. Review Photos 4 and 5 for instructions on using a cartridge puller. Make sure you twist the cartridge loose before pulling it out (Photo 4). Take the old cartridge with you to a plumbing parts store or a home center to find an exact replacement.
Install the new cartridge
Turn the hex screw by hand until it bottoms out. Snug up the hex nut by hand and tug on the cartridge puller handle. If the cartridge won’t pull out, hold the puller handle steady and tighten the hex nut two full turns. Pull the cartridge out of the faucet body. Buy an identical replacement cartridge, align it properly and reassemble the parts.


